Tutorial for First Timer/Beginner: (How to remove background)
There are many ways on removing a background:
*Eraser Tool (E)
2 Types of Eraser Tool
- Magic Eraser Tool
- Background Eraser Tool
*Pen Tool (P)
*Quick Selection Tool (W)
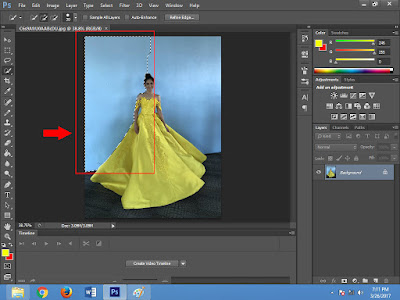
For now, I'm going to use Quick Selection Tool. It's the easiest way on removing a background.
QUICK SELECTION TOOL (W)
- After selecting the tool, adjust the settings in the options bar to vary the brush size, shape and hardness (edge softness). To make a selection paint over the area to be included. The selection outline will grow as you continue to paint. When you release the mouse button the tool will automatically refine the selection further.
- To take away from an existing selection, hold down the Alt/Opt key so that the brush tip now has a small minus sign in the middle and paint over the area to be removed. To add an existing selection, hold down the Shift key so that the brush tip has a plus sign in the middle and paint over the new areas.
- The mode buttons on the options bar can be used as an alternative method for changing from adding to or subtracting from selections.
-Click file
-Click open
-Then click the image you want to edit.
-Then click open.
You can start editing now.
-Unlock first the photo (double click).
-Click Quick Selection Too (click "w" for shortcut).
-Click on the background you want to remove.
-Then click delete on keyboard to remove the background.
-Right click on the mouse and select Deselect or for short cut, just click ctrl+D to deselect the selection.
-and this is the final result of removing a background.
It's easy, right? Once you remove the background, you can move it or you can place another background you want. But remember, it's even better if the picture you use is clear (not pixelated).


No comments:
Post a Comment